Today, we are going to talk about another best Microsoft Powerpoint trick that lets you compress image size. Yes, you can directly compress images via Microsoft Powerpoint utility. In this way, you would be able to save disk space on the device. The method which we are going to share below works with every version of Microsoft Powerpoint. However, the feature is only available for the desktop version of Microsoft Office suite.
Steps to Compress Images with Microsoft Powerpoint
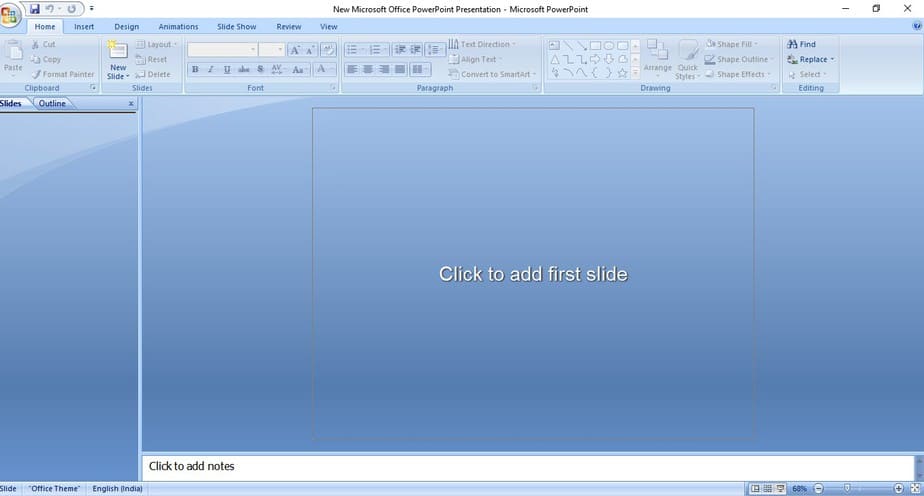
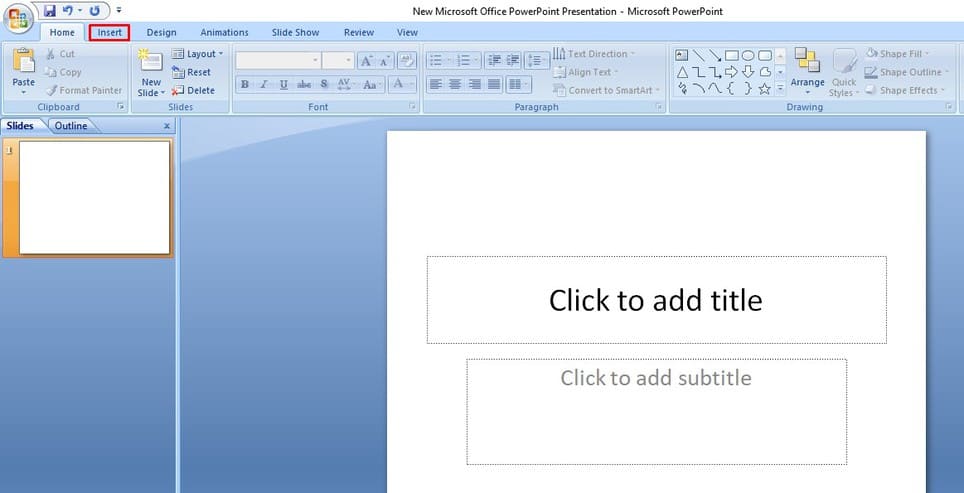
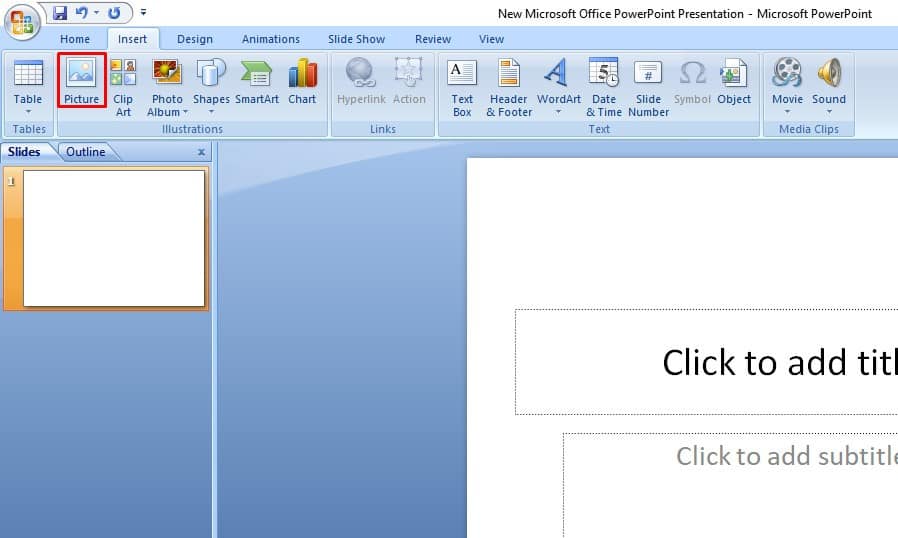
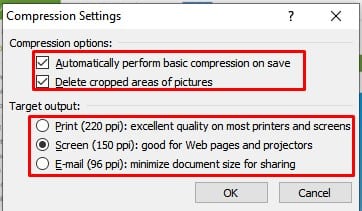
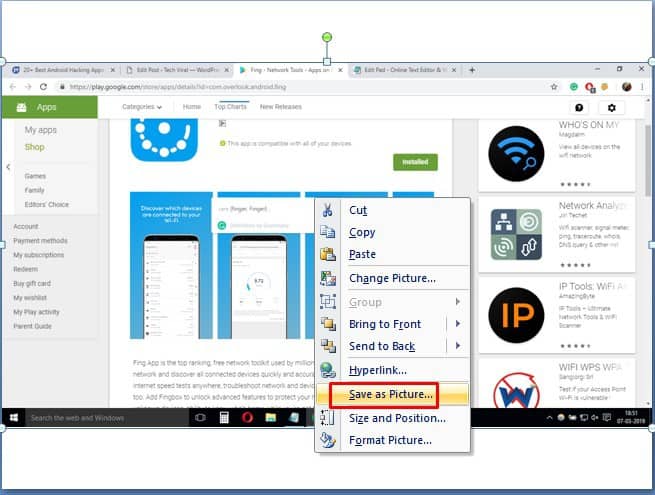
So, let’s check out the best method to compress images in Microsoft Powerpoint on Windows in 2020. Step 1. First of all, open the Microsoft Powerpoint file on your Windows 10 computer. Step 2. You will see an interface like below. Here you need to click on the ‘Click to add first slide’ Step 3. Once done, click anywhere on the slide and then click on the ‘Insert’ tab. Step 4. There you need to click on the ‘Pictures’. Locate the photo that you want to compress. Step 5. Once done, click on the ‘Compress Pictures’ option. Step 6. Click on the ‘Option’ and select the compression type. Once done, click on the ‘Ok’ button. Step 7. Now, right-click on the image and select ‘Save as Picture’. Choose where you want to save. That’s it! You are done. You will now get the compressed photo. So, this article is all about how to compress images with Microsoft Powerpoint. I hope this article helped you! Please share it with your friends also.
Δ