Also, With Advertising ID enabled, location-based apps can track and access your location to provide you with targeted ads and services. Also, advertisers keep track of your likes, dislikes, and browsing trends to show you relevant ads on their apps. Even Microsoft uses this Advertising ID to deliver you ads on the Action Center, Start Menu, and other Microsoft Apps. Although the feature is helpful for Microsoft & Advertisers, it could be a concern for every privacy-focused user. So, if you take your privacy very seriously, you should disable the feature. Hence, in this article, we will share a step-by-step guide to disable Advertising ID in Windows 11/10. Also Read: How to View WiFi Password in Windows 11
2 Methods to Disable Device Advertising ID in Windows 11
Important: We have used Windows 11 to demonstrate the process. If you are using Windows 10, you need to implement the same steps.
1) Disable Device Advertising ID via Settings
In this method, we will use Windows 11 settings to disable the Device Advertising ID in Windows 11. Here are some of the simple steps you need to follow.
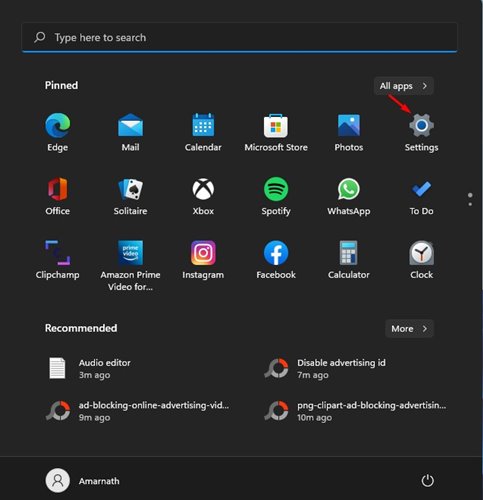
First of all, click on the Start Menu and select Settings.
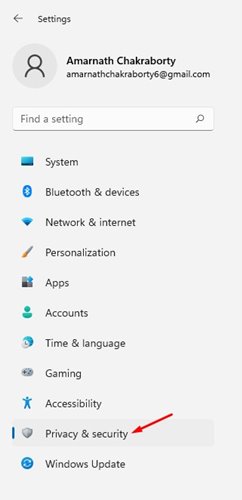
On the Settings page, click on the Privacy & Security option.
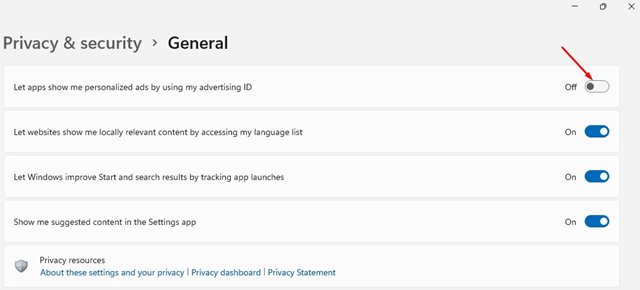
Now, under the Privacy & Security, scroll down and click on the General option under Windows permissions.
Under the General, you need to disable Let apps show me personalized ads using my advertising ID.
That’s it! You are done. This is how you can disable Advertising ID on Windows 11.
2) Disable Advertising ID via Local Group Policy Editor
In this method, we will use the Local Group Policy Editor to disable the device advertising ID in Windows 11. Here are some of the simple steps you need to follow.
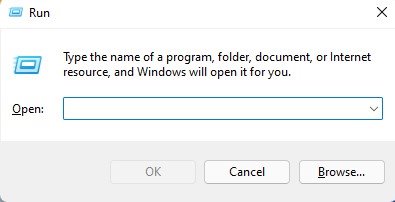
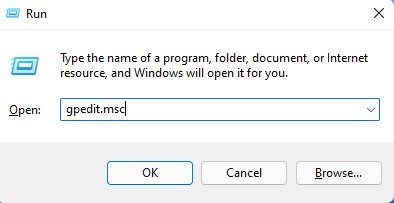
First of all, press the Windows Key + R button on your keyboard. This will open the RUN dialog box.
On the RUN dialog box, type in gpedit.msc and hit the Enter button.
This will open the Local Group Policy Editor.
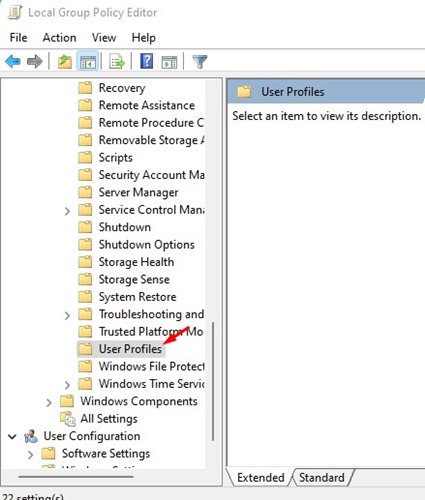
Now, you need to navigate to the following path: Computer Configuration > Administrative Templates > System > User Profile
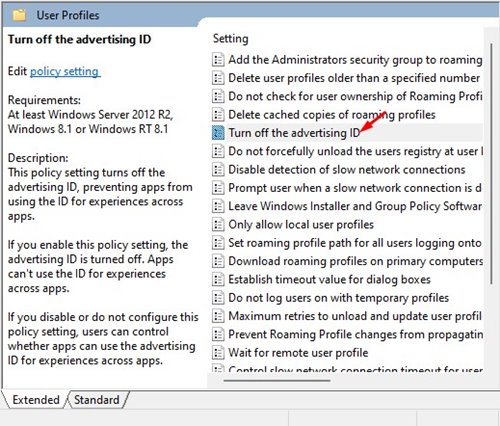
On the right pane, find and double click on the Turn off the advertising ID policy.
Turn off the advertising ID Window, select Enabled and click on the Apply button.
After making the above changes, make sure to restart your Windows 10/11 PC or Laptop. This will disable the device advertising ID. If you want to protect your privacy on Windows PC/Laptop, you should disable the device advertisement ID. I hope this article helped you! Please share it with your friends also. If you have any doubts about this, let us know in the comment box below.
Δ