We are sure that once in your Windows lifetime, you have faced some time-related issues on your system. Either the time has stopped, or the time is frequently changing. Although Microsoft fixed the latest version of the Windows operating system, a few users still get the issue. Recently, a few Windows users have asked us how to fix the problem of the Windows 10 time keeps changing.
Ways to Fix Windows 10 Time Keeps Changing Problem
So, here in this article, we have decided to share some of the few best methods that would help fix the problem of the Windows 10 time keeps changing. So, let’s explore the few best ways to fix time-related issues on Windows 10 computers.
1. Check Your Time Zone
If Windows 10 shows a different time, then there are higher probabilities that you might have selected the wrong time zone. So, to fix that issue, you need to set the time zone manually. Here’s how you can change the time zone on Windows 10 computer.
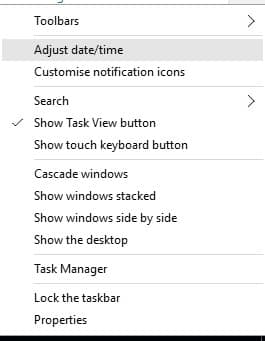
Right-click on the clock from the taskbar and select Adjust date/time
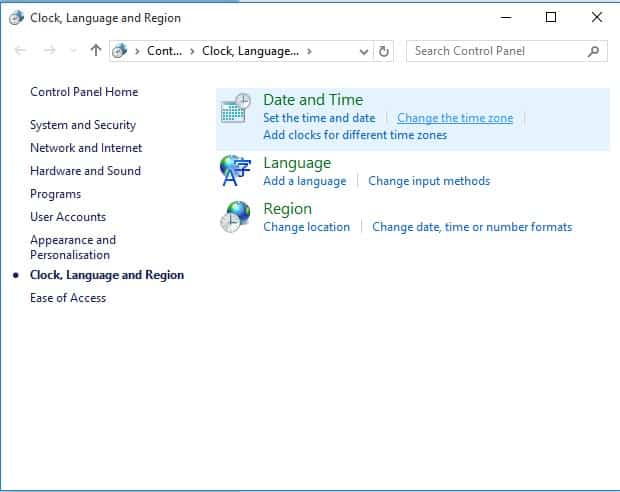
Now, it will open up the Date & time page. There you need to head to Settings > Time Zone.
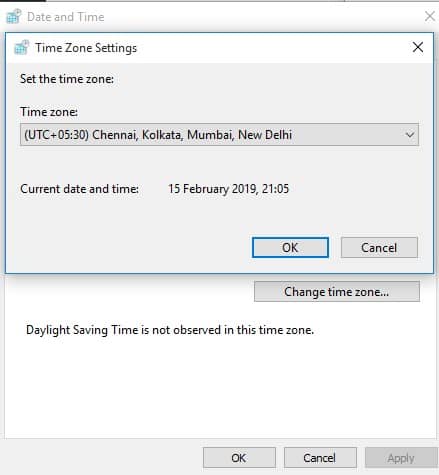
Now, under the Time Zone, you must select the correct region.
That’s it! Now exit the date & time page, and you will see the current time zone on your computer.
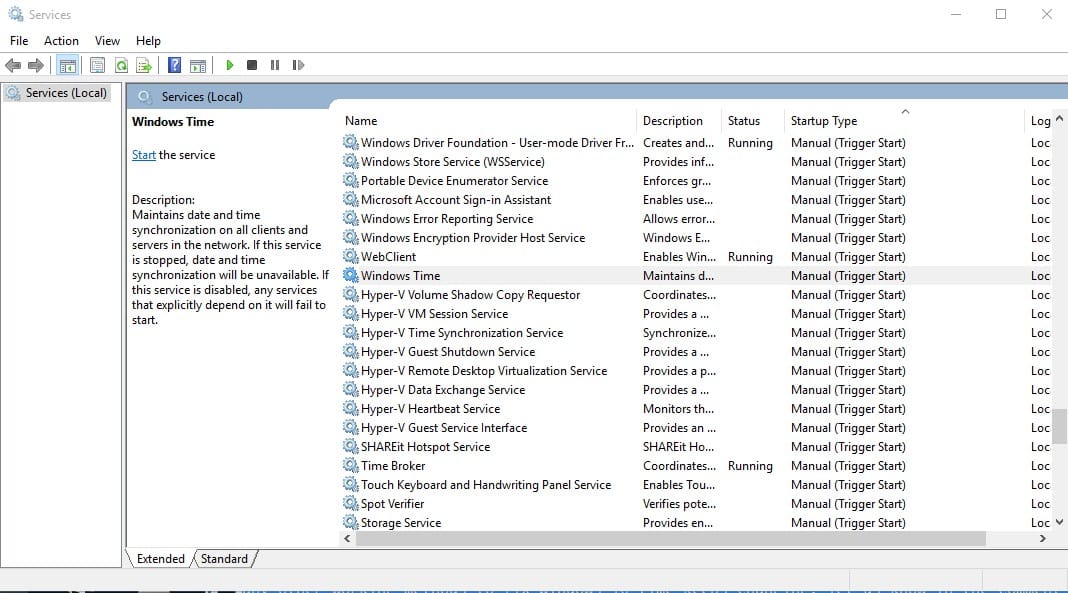
2. Using Services.msc
You can fix various Windows time & date related problems by going through Windows services. This method will force Windows time to start automatically each time the PC restarts. So, here’s how you can use services.msc to fix Windows 10 time keeps changing problem.
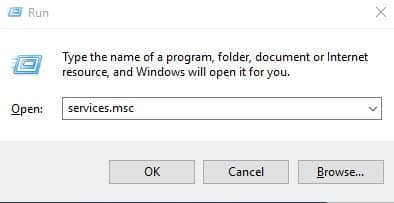
First, press the Windows Key + R on your keyboard. It will open up the run dialog box. There you need to enter services.msc and press Enter.
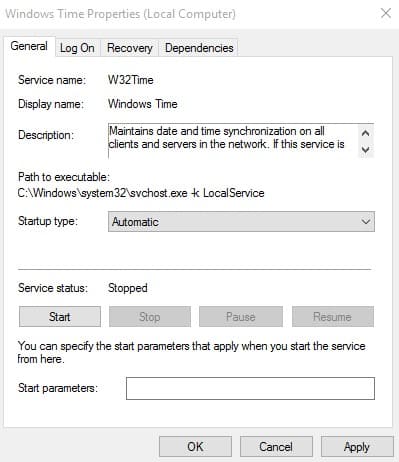
Now, you will have Windows services. You need to find and right-click on Windows Time and select Properties.
Next, you need to select Automatic under the Startup Type.
That’s it! Now restart your computer, and the Windows 10 time keeps changing problem will be solved.
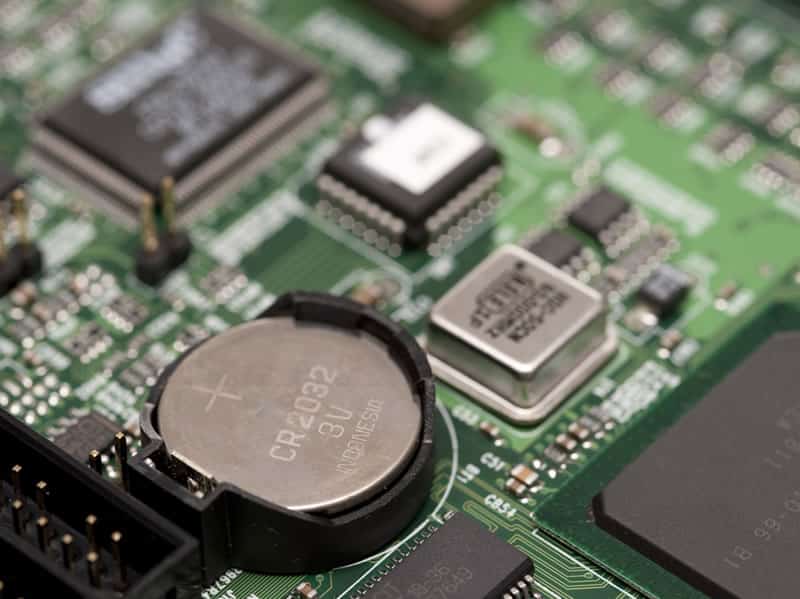
3. CMOS Battery is Dead
CMOS stands for Complementary Metal Oxide Semiconductor. It’s a kind of battery placed on the motherboard. The component looks like a coin, and contains information concerning the system configuration, including time & date information. So, if the CMOS Battery is dead or deteriorating, it will not show the wrong time. The best way to deal with problems with the CMOS battery is to replace it. For that, take your system to the local hardware expert and ask them to check the CMOS Battery condition.
4. Malware Attack
Malware attacks can also change the current time and date of your Windows 10 computer. Since some malware play with the system and registry files, getting your system time and date changed during the attack is not a big deal. Nowadays, malware has become so advanced that it can remain undetected for a long before visible changes become evident. Malwarebytes is the best security tool to deal with hidden malware, and it can also remove PUPs and adware. Even if you are not willing to use Malwarebytes, turn on the Windows Defender that comes with your Windows OS.
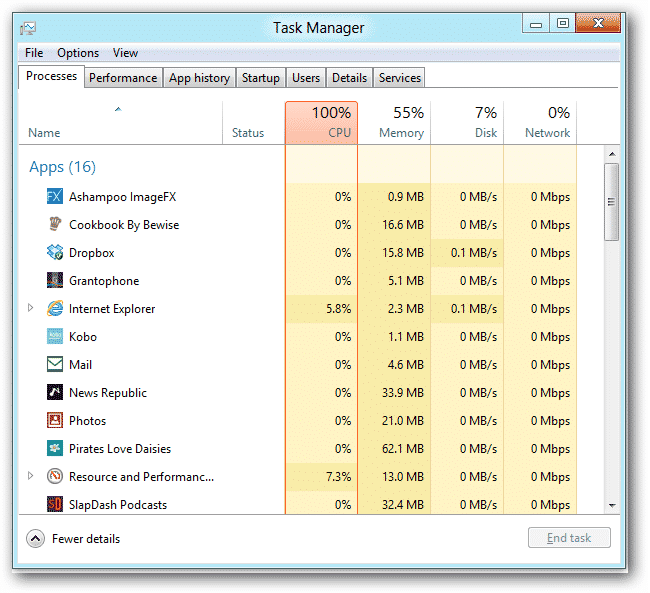
5. Check Third-Party Softwares
Well, if you are experiencing a time-related problem on Windows 10 after installing any new program, that particular program or game might be the culprit. Third-party programs or even screen savers sometimes cause the time to stop. So, open the Task Manager and End Task software.
If the problem persists, disable the screen saver as well. If the computer date and time change automatically on reboot, check the ‘Startup’ tab on the Task Manager and disable all unnecessary apps.
6. Reset System
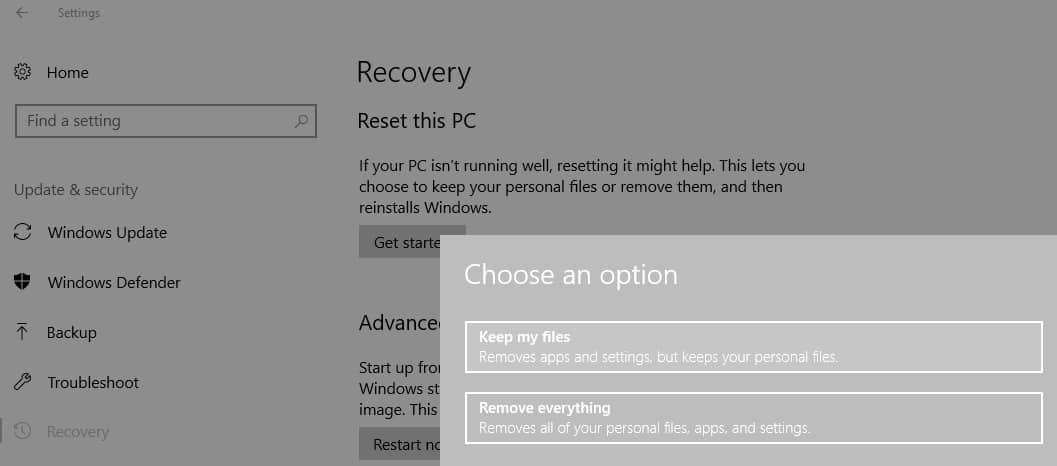
The good thing about Windows operating system is that it allows users to reset the system. So, if all methods fail to fix the Windows 10 time keeps changing problem, the final solution is to perform a System Reset. However, it will remove files and folders saved on the Windows installation drive. So, make sure to create a proper backup before you choose to reset your PC. To Reset the computer, head to Settings > Update and Security. Select the Recovery tab and then click on ‘Get Started‘ under the Reset This PC.
Once done, you will see two options, ‘Reset this PC’ and ‘Keep My Files’. There you need to pick the ‘Reset This PC‘ option. That’s it; you are done! Now you need to wait until the operation completes. So, these are the six best methods to fix Windows 10 time keeps changing issues. If you know any other working methods to fix Windows 10 time keeps changing, let us know in the comment box below.
Δ